Long story short
I own a VW e-UP! from 2021. It’s fully electric, and a really nice car in general – except one thing; it comes with a 3G modem installed. A car from 2021 with 3G…
It has worked out fine up until the country I live in (Sweden) decided to shut down 2G and 3G to make room for the faster 4G and 5G networks. I emailed VW and the response was more or less “deal with it, it’s not our fault”. Long story short, I eventually settled with the thought of not being able to use the built in modem in the car, and in turn not be able to smart charge through Home Assistant.
Yet, I didn’t want to give up that easy. So I had a look around for options, and to my surprise I found exactly what I was looking for – OVMS!
What is OVMS?
Easy put, it’s a module replacement for the car modem – and together with a server it talks to both an Android and iOS app over MQTT (V3) or with a server written in Perl (V2). It talks both 4G and WIFI.
You can find all you need to know here and here.
You can choose to run it on a public server setup by Open Vehicles, or from one of the maintainers of the project. Either one of those options are free of charge. You could also choose to run it from your own server, and that made me exited!
Running your own server
To be honest, the documentation isn’t crystal clear. It took me a few hours of spare time to sort it all out. My intention with this little project was to dive in to learn how it all is put together, and at the same time build a tiny, lightweight, and secure server that could serve as my public endpoint for the OVMS V2. To save you some time, here are my notes. I plan to add this to the OVMS documentation as well when I perfected the setup, but for now here you go:
Specs
OS: Alpine Linux Virtual (3.21)
CPU: 2 vCPU
RAM: 2 GB vRAM
Install and setup Alpine
I won’t go into details here, but basically:
- Download the ISO
- Create a VM to run it on
- Mount the ISO and install
- Run
setup-alpine - Install with
sysandlvm(my preferred choice at least) - Run
setup-ntp - Continue to follow this guide
MySQL (or MariaDB)
It seems like Alpine is forcing MariaDB for some reason, even when installing with apk add mysql. MariaDB seems to work just as well, even though Perl and CPAN caused some issues for me.
Install and setup
apk add mariadb mariadb-client
mariadb-install-db
/etc/init.d/mariadb setup
rc-service mariadb start
mysql_secure_installation
rc-service mariadb restart
rc-update add mariadb default
Create the database
mysql -u root
CREATE USER 'ovms_db_user'@'localhost' IDENTIFIED BY 'password';
CREATE DATABASE IF NOT EXISTS openvehicles;
GRANT ALL PRIVILEGES ON openvehicles.* TO 'ovms_db_user'@'localhost';
exit
Enable UTF8mb4 (4-byte support)
Create this script and run it:
MARIADB_PASS="SECURE PASSWORD"

databases=$(mariadb -u root -p"$MARIADB_PASS" -e "SHOW DATABASES;" | tr -d "| " | grep -v Database)

for db in $databases
do
    if [[ "$db" != "performance_schema" ]] && [[ "$db" != _* ]] && [[ "$db" != "information_schema" ]]
    then
        echo "Changing to UTF8mb4 on: $db"
        mariadb -u root -p"$MARIADB_PASS" -e "ALTER DATABASE $db CHARACTER SET utf8mb4 COLLATE utf8mb4_unicode_ci;"
    fi
done
Create OVMS DB tables
cd /home/ovms/Open-Vehicle-Server/v3/server/
mariadb -u ovms_db_user -p openvehicles < ovms_server.sql
mysql -u ovms
use openvehicles;
INSERT INTO ovms_cars (vehicleid, owner, carpass, userpass, cryptscheme, v_ptoken, v_lastupdate) VALUES ('REGNUMBER', '1', 'DEMOUSER', 'DEMOPASS', '0', '', 0000-00-00 00:00:00);
Check the results
It should look something like this:
MariaDB [openvehicles]> select * from ovms_cars;
+-----------+-------------+-------+-----------+---------+----------+-------------+----------+----------+--------+---------+---------------------+---------------------+------------+
| vehicleid | vehiclename | owner | telephone | carpass | userpass | cryptscheme | v_ptoken | v_server | v_type | deleted | changed | v_lastupdate | couponcode |
+-----------+-------------+-------+-----------+---------+----------+-------------+----------+----------+--------+---------+---------------------+---------------------+------------+
| REGNUMBER | | 1 | | DEMOUSER | DEMOPASS | 0 | | * | CAR | 0 | 1900-01-01 00:00:00 | 0000-00-00 00:00:00 | |
+-----------+-------------+-------+-----------+---------+----------+-------------+----------+----------+--------+---------+---------------------+---------------------+------------+
1 row in set (0.001 sec)
Create the OVMS config file
cp conf/ovms_server.conf.default conf/ovms_server.conf
Replace the path with this:
path=DBI:MariaDB:database=openvehicles;mariadb_socket=/var/run/mysqld/mysqld.sock;
TLS
I run my TLS on a reverse proxy, and what I usually do is to Share Let’s Encrypt SSL certificates between hosts. In Alpine these are the commands on the client side:
apk add nfs-utils
rc-update add nfsmount
rc-service nfsmount start
Check that the service started.
rc-status
mkdir -p /mnt/letsencrypt
Add your share to /etc/fstab according to the guide above.
ovms_server.pem
Create a script to sort the .pem file for the TLS cert on the client, and run it.
OVMS_CONF_DIR=/path/to/Open-Vehicle-Server/v3/server/conf

cat /mnt/letsencrypt/live/domain.tld/privkey.pem /mnt/letsencrypt/live/domain.tld/fullchain.pem > "$OVMS_CONF_DIR"/ovms_server.pem
chmod 0600 "$OVMS_CONF_DIR"/ovms_server.pem
chown ovms "$OVMS_CONF_DIR"/ovms_server.pem
Don’t forget to add a cronjob for renewing the ovms_server.pem
Install Perl
apk add perl perl-dev
Add build dependencies
apk add zlib zlib-dev curl tar make gcc build-base wget gnupg ca-certificates g++ git gd-dev mariadb-connector-c-dev
Install and configure CPAN
I opted to run CPAN on a seperate non-root user to keep the security as tight as possible. The precondition here is to create a seperate non root user with something like adduser ovms before. What I yet didn’t figure out is how to load the shell (like you do with .bashrc on Alpine.
su -l ovms
curl -L https://cpanmin.us | perl - App::cpanminus local::lib
eval $(perl -I ~/perl5/lib/perl5/ -Mlocal::lib)
echo 'export PATH=$PATH:/home/ovms/perl5/bin' > /home/ovms/.ashrc
echo 'eval $(perl -I $HOME/perl5/lib/perl5/ -Mlocal::lib)' >> /home/ovms/.ashrc
echo "export MANPATH=$HOME/perl5/man:$MANPATH" >> /home/ovms/.ashrc
. ~/.ashrc
Install the CPAN modules
Here’s what I’m running right now. Not tested, and the server isn’t in production yet, but at least it’s running when I start it – without any errors.
cpanm CPAN::DistnameInfo
cpanm Module::Build::Tiny
cpanm Config::IniFiles
cpanm Digest::MD5
cpanm Digest::HMAC
cpanm Crypt::RC4::XS
cpanm MIME::Base64
cpanm DBI
cpanm DBD::MariaDB
cpanm EV
cpanm AnyEvent
cpanm AnyEvent::HTTP
cpanm AnyEvent::HTTPD
cpanm HTTP::Parser::XS
cpanm Data::UUID
cpanm Email::MIME
cpanm Email::Sender::Simple
cpanm Net::SSLeay
cpanm JSON::XS
cpanm Protocol::WebSocket
cpanm Time::Piece
Start the server
cd Open-Vehicle-Server/v3/server/
./ovms_server.pl
Create a service
Maybe not the prettiest, but it works.
nano /etc/init.d/ovms_server.service
!/sbin/openrc-run
name="OVMS_V3_Server"
command="/bin/bash /home/ovms/start_ovms_server.sh"
command_args=""
command_user="ovms"
pidfile="/run/$SVCNAME.pid"
command_background=true

depend() {
need net
use dns # don't know if this is needed, probably not
}
chmod +x /etc/init.d/ovms_server.service
And the script that it calls
!/bin/bash
. /home/ovms/.ashrc
cd /home/ovms/Open-Vehicle-Server/v3/server
./ovms_server.pl
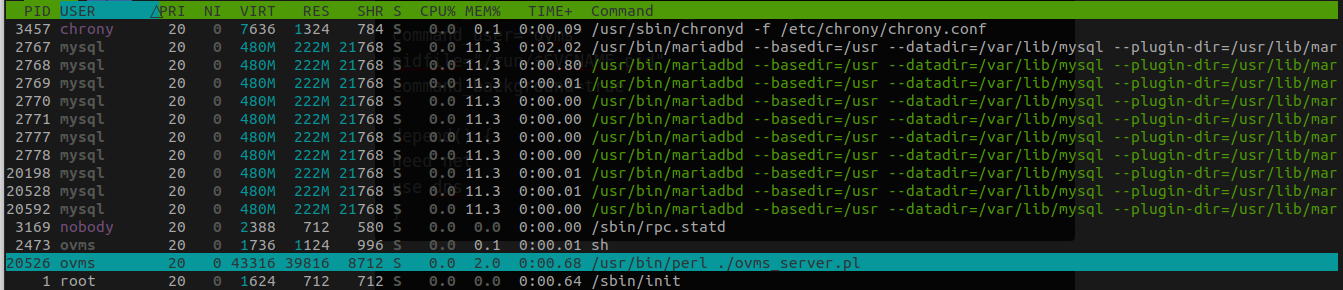
And the service runs as the user ovms, just as I wanted.
MQTT
EDIT: This is not how you do MQTT. This is just how you add the client to your server, but you don’t need it really since everything can be done through your MQTT Broker/Client. Check “Part 2” below if you’re interested.
Not 100% sure about this at the moment, but managed to run what I think is the MQTT client anyway
Install dependency for AnyEvent::ReadLine::Gnu
apk add readline-dev
su ovms -l
. .ashrc
cd Open-Vehicle-Server/v3/server/
wget https://raw.githubusercontent.com/openvehicles/Open-Vehicle-Monitoring-System-3/refs/heads/master/client/ovms_v3shell.pl
chmod +x ovms_v3shell.pl
cpanm Term::ReadKey
cpanm AnyEvent::ReadLine::Gnu
AnyEvent::MQTT
Test that it’s working
./ovms_v3shell.pl -V -username=DEMOUSER --id=REGNUMBER --server=ovms.domain.tld
Now I just have to wait
The next thing is to connect your OVMS module to it – but since mine doesn’t arrive until after the weekends, I can’t test it yet. During testing I things will become more obvious as well, like how the MQTT part works for example. Like I mentioned earlier, these are just my own notes, and I will make a PR to put it in the documentation for OVMS, but until then – I hope this helps someone. :)