If you never ever tried this before we made a step-by step guide that you can follow. Please contact us and give us feedback if there is something we can improve.
You find the pre-configured VM here.
Please note that this is a 64-bit VM and something called “Virtual Technology” or “VT”, has to be enabled in the BIOS if you don’t have the option to choose 64 bit. This is already enabled by default on newer computers.
1. Download VMWARE PLAYER.
We made the VM in VMware Workstation 10, so for best compatibility we recommend VMware Player. It’s free and easy to use. Of course you can use other software if you want to, as long as it mounts .vmdk
When you choose the free version it will ask you about your email. You can write whatever you want, or your real address as well – VMware won’t notice. Either way, you can always unsubscribe from their newsletters (if any) when you get the first mail. You usually do this in the footer of the e-mail.
If you are on Mac, you can use VirtualBox.
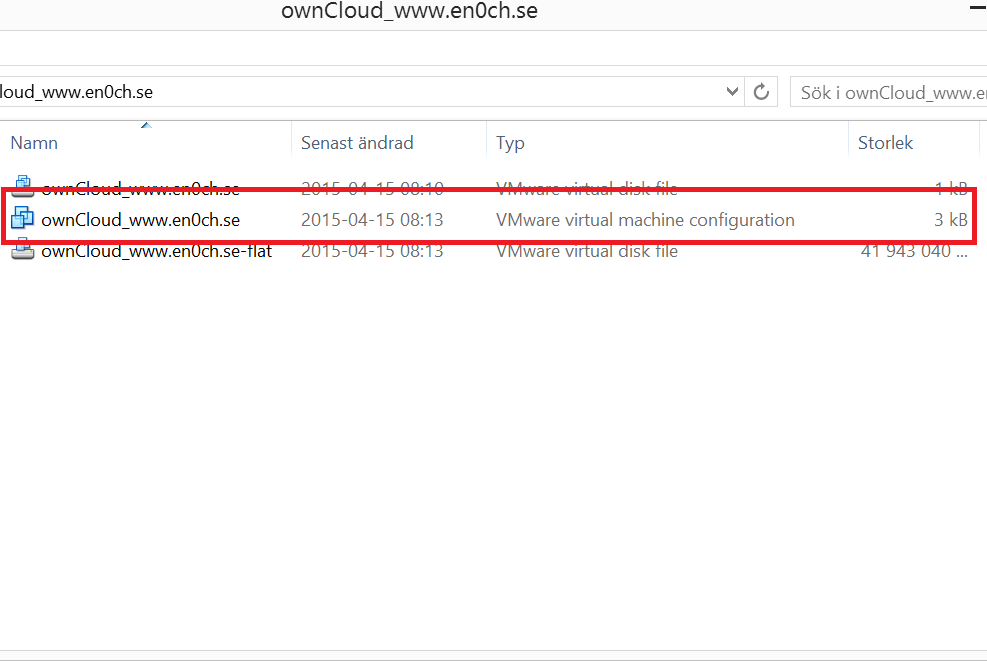
2. Extract the RAR Package, ownCloud_www.techandme.se.rar
Please make sure that you have >20 GB free space on you hard drive, as the VM is that size when it’s extracted. You can find all the needed extract software here.
3. Mount the vm
Open VMware Player and mount the VM by double-clicking the .vmx file located in the folder that you just extracted. Then start the Virtual Machine. If it asks you if you moved or copied it – choose copy.
If you’re on VMware
Open the Virtual machine
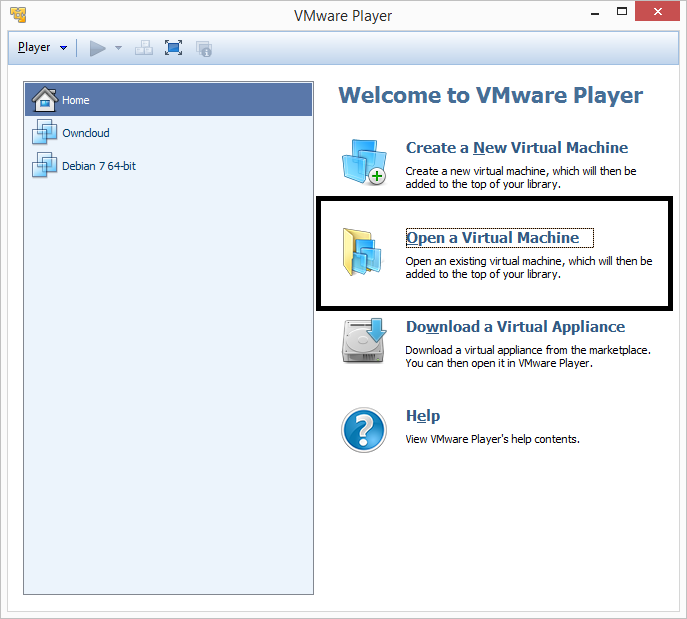
mount the .vmx
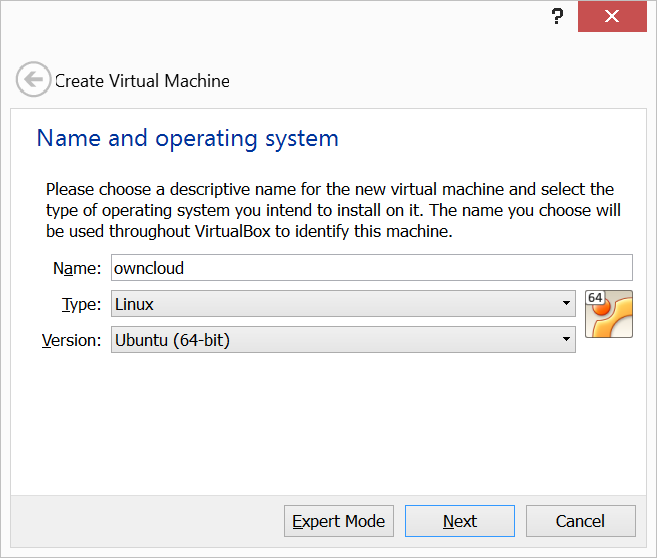
If you’re on VirtualBox
Click on “New” and this will open:
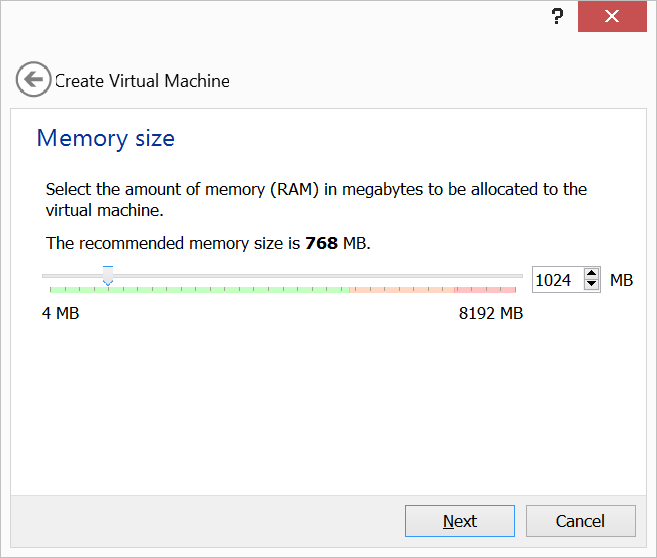
Choose how much RAM you want to use:
Use existing:
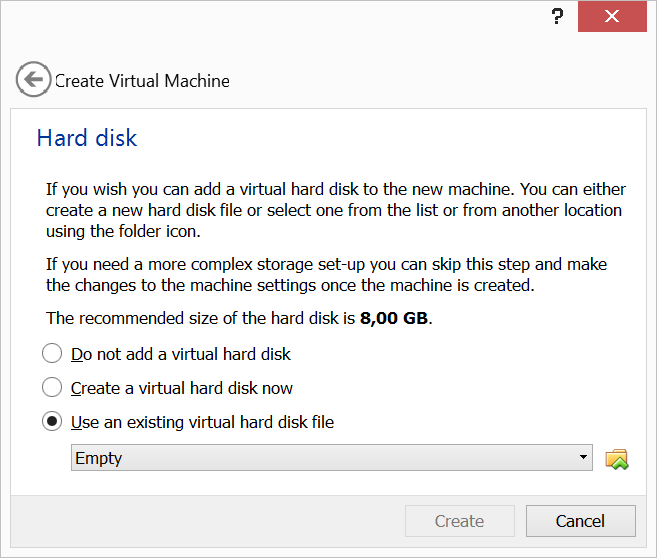
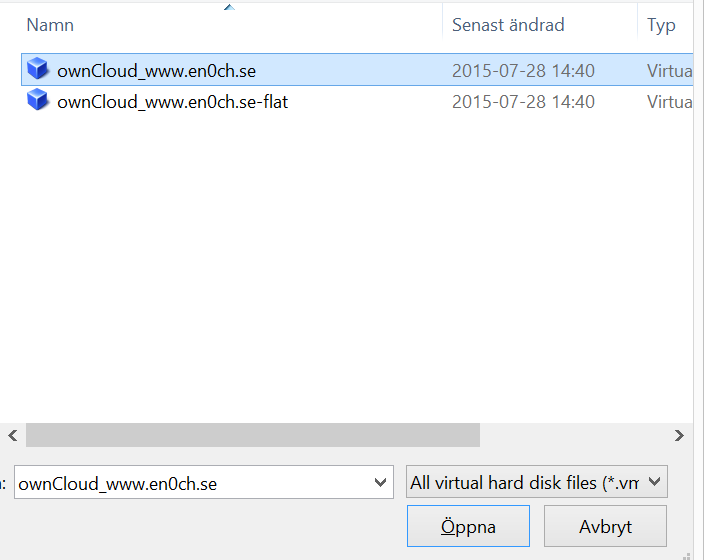
Don’t choose the “-flat”:
When the .VMDK is mounted, then Set the network adapter to “Bridged Mode” in network settings.
4. Log in to the virtual machine
When the machine is started, you have to log in, using this credentials. Use putty.exe (if you’re on Windows) to be able to copy and paste in terminal. When you are logged in you just type the sudo password like this:
[sudo] password for ocadmin: owncloud
The script runs as soon as you become root in Ubuntu. When the script is finished it gets deleted and you will be able to run the sudo -i (to become root) command as usual.
The VM is built upon the script, so if you don’t run it you will run into issues. I.e. you will get a white screen instead of a login page when you try to access ownCloud, and you manually have to add the trusted domains and such. It’s important to run the script the first thing you do after you’ve logged in.
2015-11-17 – Not needed anymore
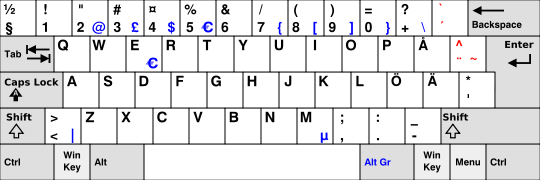
You may have to change the keyboard layout temporarily to be able to use the – sign.
:~$ sudo loadkeys us
The example shows how to change to US keyboard. Of course you can choose whatever language you want.
The current keyboard setup is Swedish and if you don’t know your language keymap short code, this is a Swedish keyboard:
Here is how you login:
This video is old, we will replace it soon.
If you should fail to write the password or something goes wrong, you can run the script manually by typing:
$~: sudo bash /var/scripts/owncloud-startup-script.sh
Putty.exe (if you want to access the SSH terminal from a Windows machine)
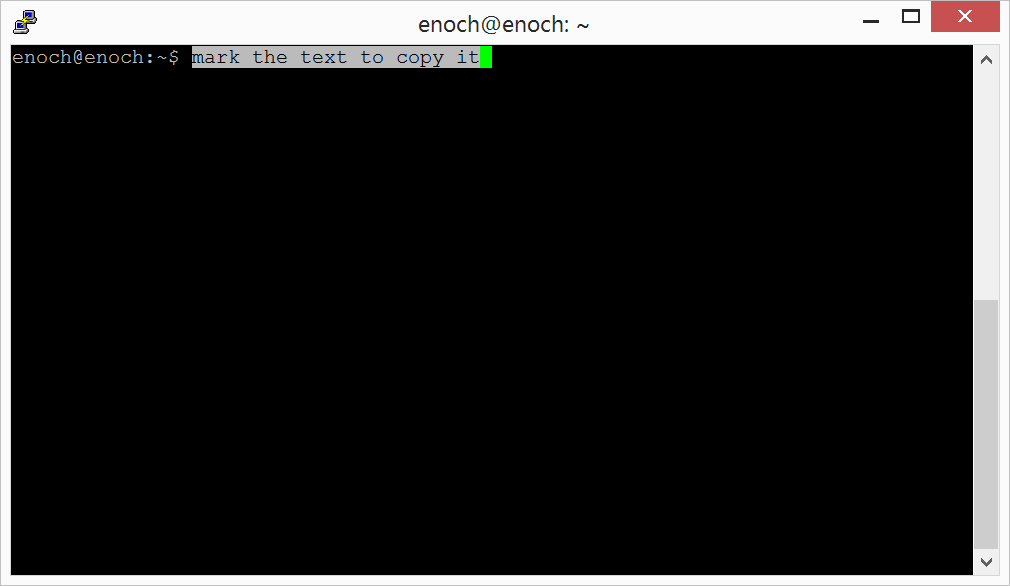
To [copy] text in the terminal you just mark it. Right-click with the mouse to [paste] it.
Enter your internal (STATIC) IP

Mark the text
Note, if you logged in with SSH and then tries to reconnect after you ran the script you will be prompted to remove the old key in your users home folder. The command looks something like this:
ssh-keygen -f "/home/daniel/.ssh/known_hosts" -R 192.168.1.172
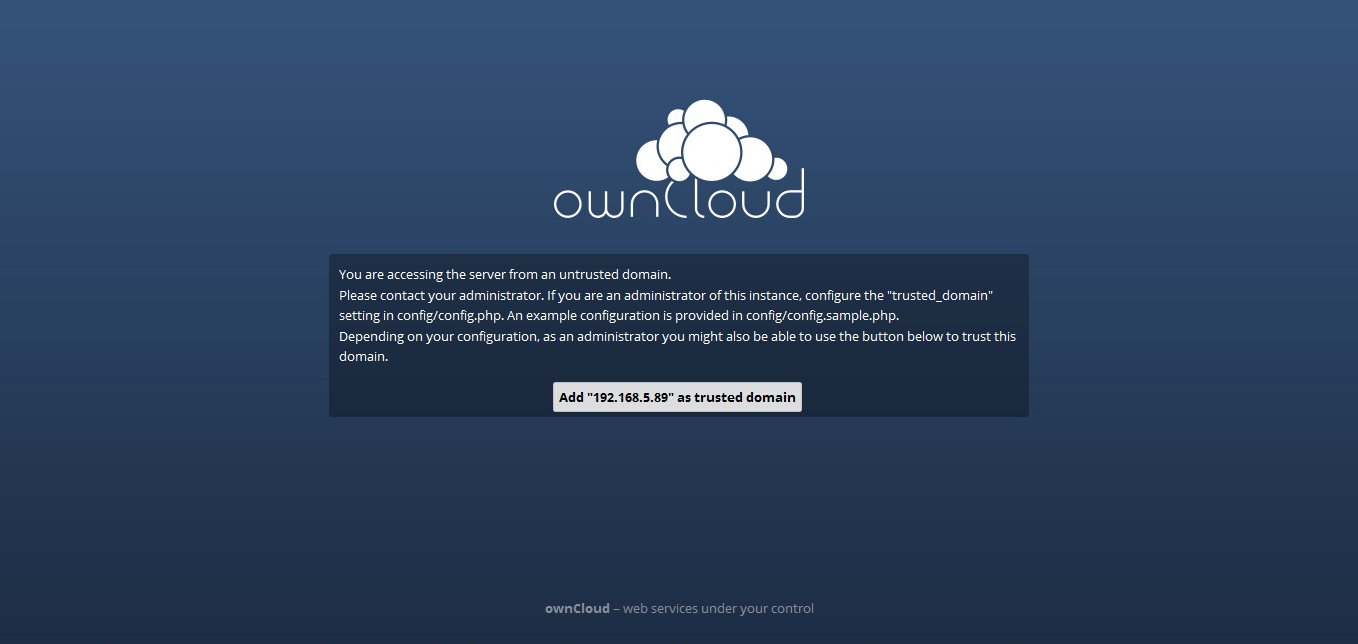
5. Change “trusted DOMAIN” in config.php
2015-08-07: This step is now automated and you don’t need to change this. It could be useful to someone anyway, so we’ll keep the instructions online.
If you don’t change this you will get prompted with this screen.
To change it, go to your terminal and write this:
:~$ sudo nano /var/www/owncloud/config/config.php
Then add your IP adress, or your domain name like this:
'trusted_domains' =>
 array (
 0 => '192.168.1.XXX',
You also have to change this in config.php
'overwrite.cli.url' => 'http://192.168.1.XXX/owncloud',
Change .XXX to the IP or domain you will use.
6. Get a trusted SSL cert with Let’s Encrypt
To get a real SSL cert, you have to make some preparations. First thing is to forward port 443 in your router. The second thing is to get a domain. You can always run the script later on by typing:
:~$ sudo bash /var/scripts/activate-ssl.sh
7. PUBLISH YOUR SERVER ONLINE
If you want others to access your ownCloud from outside your own network you have to make it public.
8. Congratulations!
You have now successfully installed your ownCloud. To access it, use your domain name, or internal (static) IP address.
Please report issues here.
PRO TIP
-
The Virtual Host “default-ssl.conf” is deactivated and replaced by “owncloud-self-signed-ssl.conf”. Edit this file to suit your config, here is a guide.
-
To update your ownCloud, use the built in bash script:
:~$ sudo bash /var/scripts/update.sh
Some useful commands
Write faster in Linux shell
Linux predicts what you want to write. So instead of writing those looong commands and paths you could just use the tab button after you wrote a few letters.