We installed Virtual Box on Linux Mate through the
App Grid. Virtual Box can run software that you otherwise only can run in Windows environment.
Running an entire OS as a program.
You can do a one-click from Ubuntu Software Center or App Grid. Users of Ubuntu MATE can choose which “software center” they want to use. We chose App Grid.
(If you use Ubuntu you download Virtualbox from here)
-
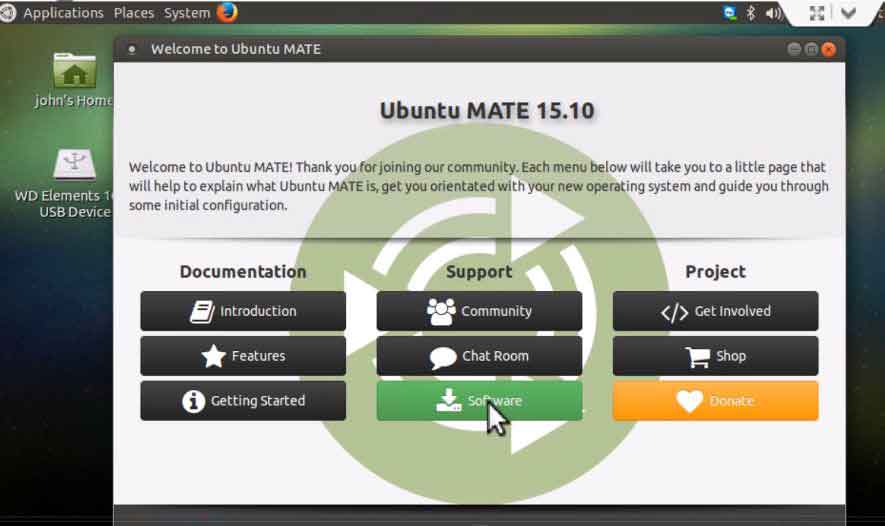
When booting Ubuntu Mate do not close “Welcome to Ubuntu Mate”
-
Click on software
-
In “more programs” you will find: APp GRID, Install the package.
-
Open AP GRID in Systen/Admistation
-
Click on search and write: virtual
-
Install Virtual Box
Once the program is installed, go to applications/accessories and start Virtual Box . We will now install Windows XP because it only needs 192 MB memory.
Disc or ISO file is the installation media. We use an ISO file = disc image.
-
Click on “new” to create your OS
Next
-
Give it a name, it can be what ever you like
Next
-
WE select the default memory, 192 MB. On our PARTICULAR machine the ram is limited. But do you have more, it is safer to install Windows 7, 8 or 10.
Next
-
“Create a hard disk now”
Create
-
WE select the default = VDI
Next
-
“Storage…” “Dynamic allocated” or “fixed size” What ever you want. Dynamic grows when you fill it and fixed is the size you choose from start.
Next
-
“File location and size”, We choose the default
Create Now
The Virtual Box create the virtual hard drive file. It’s the one you need to install your Windows OS on -
Close “Create virtual hard disk”
Back to the Virtual Box program window. Now we mount our XP disc or in my case we use the ISO file. There for, we make changes in settings/storage. If you use a real CD/DVD you can you can skip steps 16 to 19
-
In the upper panel choose “Settings”
-
Click on “Storage”
We mark our CD. It’s blank because we have no physical CD / DVD. Then we check our ISO file of XP installation media in the folder on the computer where it’s stored.
-
“Open”
OK
-
Hit “start” in Virtual Box and Windows begin to install
-
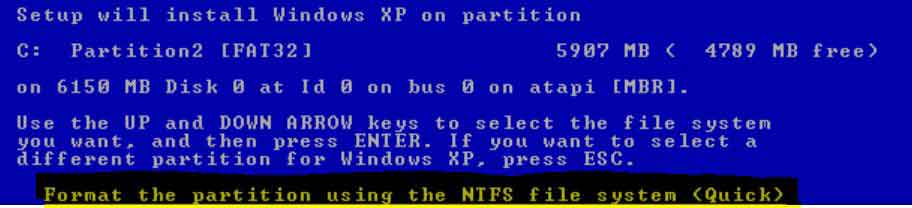
Click in your virtual machine and hit ENTER key to Partition the virtual hard disk, use the up and down arrow keys to navigate
-
Format the partition using the NTFS file system (Quick)
If you remember it’s not funny to install XP and takes a lot of time. The process is like; wait, please fill in, wait and look happy and fill in more information XP needs.When you later use XP, consider this: updating and patching until you have received all security patches. XP is still not safe. Let it roll isolated in Virtual Box for only use to the non Linux programs you want to run.If you need to run the unsecured virtual XP remotely from a Windows PC we show you how you can do that, if you have installed XP Pro. XP Home doesn’t have a Remote Desktop server.
-
In settings on Virtual Box go to:
“Network” an set the adapter to Bridge
-
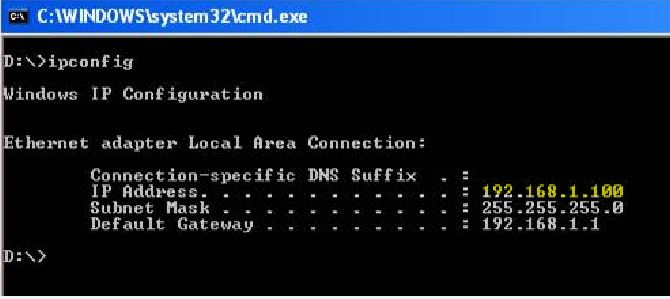
Back in virtual XP, hit “start” then “run”, write “CMD” to get the console. Then in console, type
ipconfig
You get your XP:s IP address under:
“Ethernet adapter Local Area Connection”, example: 192.168.1.100
-
Still In virtual XP, right-click the “My Computer” select “System” “Properties” and last “Remote” and tick in: “Allow users to connected remotely to this computer”.
-
Start the Remote Desktop application in Windows 7/8/10 and put in the IP address you get from “ipconfig” command, example: 192.168.1.100 .

Fill in your XP user name and password you created during the installation.
Now you have contact. Let it be the only one in your computing environment that makes contact with XP. Turn off the copy paste between remote and host in option on the Remote Desktop application. Do not let XP contact other PCs in your network. Support for Windows XP ended April 8, 2014. There will be no more security updates or technical support for the Windows XP operating system.If you prefer, Here a short movie about the guide